
We always wanted custom reports so we created them for you!
The whole idea of POS systems is to collect certain information for your business and to present you this information in a format you need and understand. We realised that every business is unique and even though IncoPOS has more than 40 built-in reports we created an easy tool to help everybody design and use a custom report that he or she wants.
Here is how to create your own custom report in 6 steps. For example we will show you how to make a report called “All sales to VIP clients for the current month” in just a few minutes:
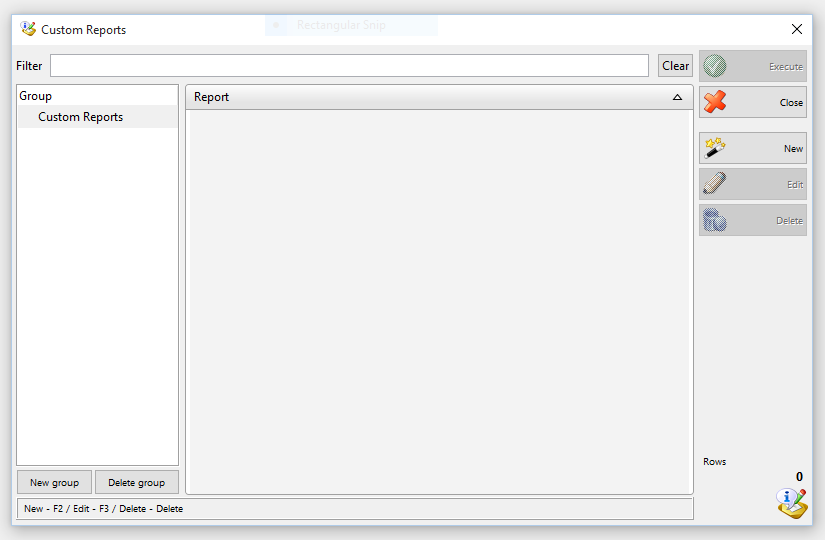
- From the menu “Reports” where you can see all built in reports, choose “Custom reports” and then “Edit reports…”.
- Click on the button “New” to see the report editor.
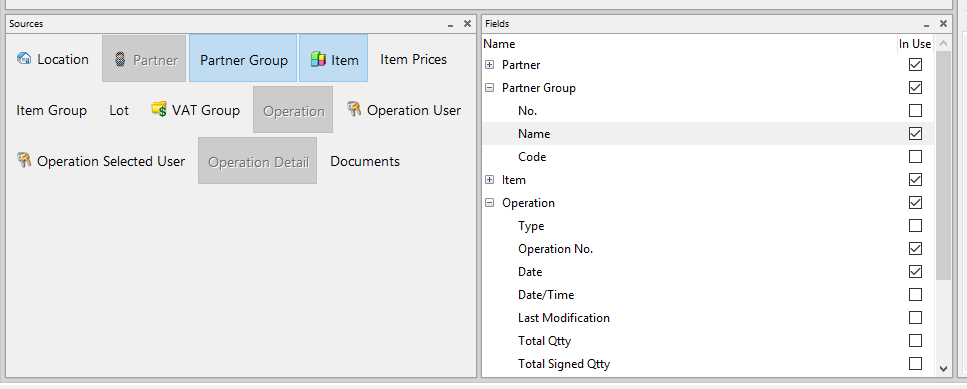
- Now you have to choose “Sources” of information from the bottom left window. For the purposes of this example we select the following sources – Operation; Operation Detail; Item; Partner and Partner Group.
- In the next window you choose the fields you want to visualize in your custom report. For our custom report we will leave checked only the boxes as follows:
– For “Operation” – “Operation No” and “Date”
– For “Operation Details” – “Quantity” and “Sale price”
– For “Item” – only the Name field
– For “Partner” – only the Name field
– For “Partner Group” – only the Name field
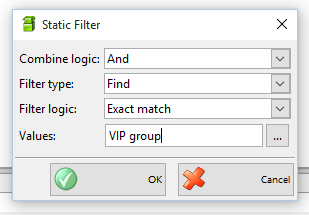
- The last window you can modify is called “Filters”. Here we choose “Date” of operation and we add static filter “This month”. To do that select the “Static filters” tab in the Properties panel and press the “Add” button. (Note: static filters will be applied automatically every time you start this custom report). We also add a static filter for the Name field in “Partner group” with logic “Exact match” so that it matches “VIP group”.
In the fields with static filters you can uncheck the box “Allow user filtering” in the “User filter” tab. This will remove the field asking the user to enter a filter for this field.
Also we know that the partner group “Name” column in the result will always be “VIP Group”. So this column doesn’t really give us any useful information, but we need that field enabled in order to filter by it. To hide it from the result we select that field and choose the “Visibility” tab in the properties panel. There we can select “Always invisible” and this field will never be displayed in the result, leaving space for the other useful information.
The other panels in this window are for preview of your custom report and help you easily see the information that the result will produce and how your filters before the report is run will look like.
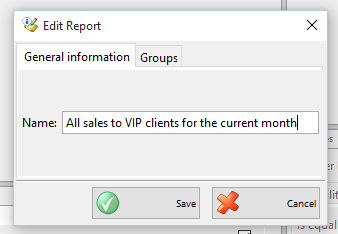
- The last step in creating your report is to click “Save”, choose a name for your report and finish with “OK”. Now your new report is present in the menu “Reports->Custom reports…”.
You can make as many reports as you wish and save yourself the time and effort to look in details you don’t need right now. You can also organize them using groups so they appear in sub menus. Furthermore, you or your accountant can concentrate on the information that is important and ignore the rest of the data, making your work less prone to mistakes.
Once created custom reports are available to everyone using your database and you can use them from any workstation or create and modify reports that will be helpful for remote employees.