How to install MySQL server on Mac OS X
Mac OS X has a great design and a lot of tasks are really easy to do. Unfortunately if you want to have MySQL server installed on your Mac this is not always as simple as everything else.
But wait do I need MySQL server?
In many cases you do not. If this is going to be the only computer on which you will have your sales information, you are planning to have only a few operations every day, or you will connect to other computers using IncoCloud, then no, you can use SQLite and keep things simple.
But if you have more than one computer in the office/shop/restaurant connected together – one or more front office computers or tablets and one or more back office computers all in a single location, for example, or you expect many operations made every day, then you need MySQL server to handle the big load.

Important! IncoPOS – our Point of Sale system for macOS can now download, install and configure MySQL server for you. This happens from the built-in wizard when IncoPOS is started for the first time. You can download IncoPOS from here.
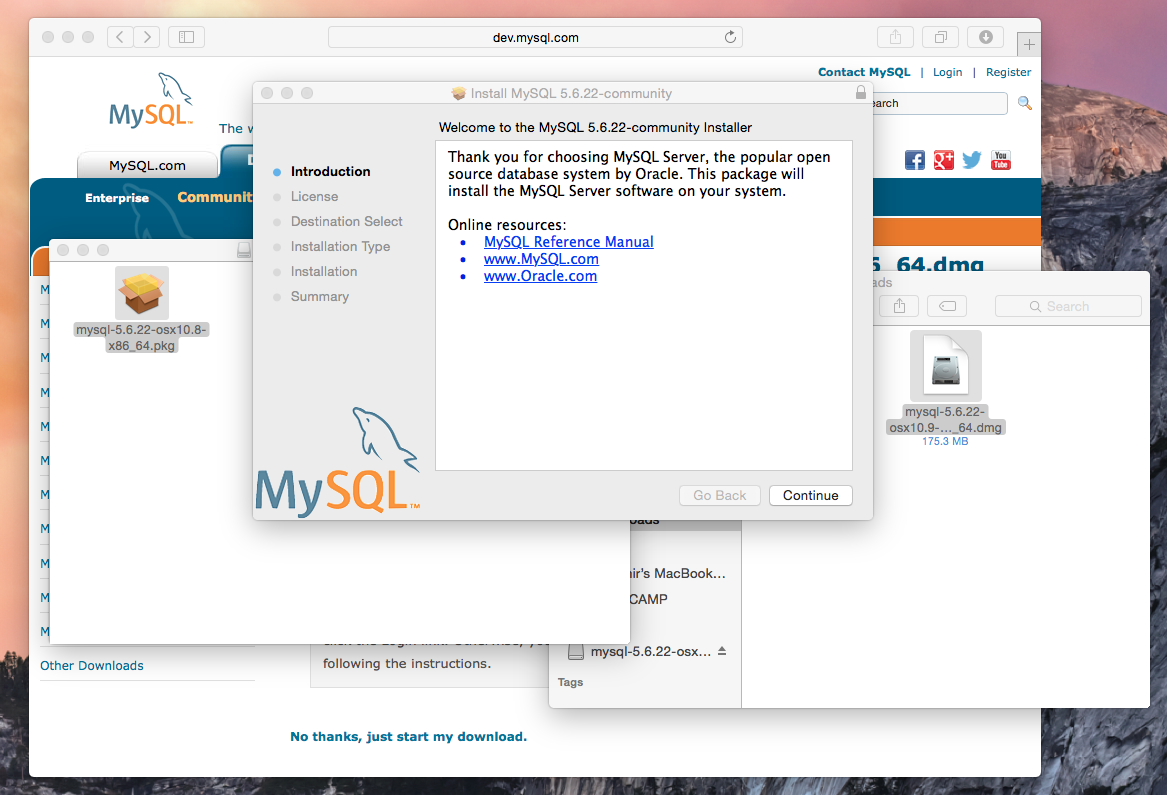
Warning! Because Oracle has changed the MySQL installer and the default parameters of the MySQL server in newer versions the following steps may no longer work. These steps were tested with MySQL server version 5.5.48 for Mac OS 10.9 (which should work on newer versions too). Please download and install version 5.5.48 to make sure that all the steps will work correctly. If for some reason the installer is no longer available on the MySQL web site you can download it from here.
Now comes the tricky part. By default MySQL server installs without password and does not restrict access to the information on it. This is not a great idea for us because your information is sensitive and we don’t want the whole world to be able to access it.
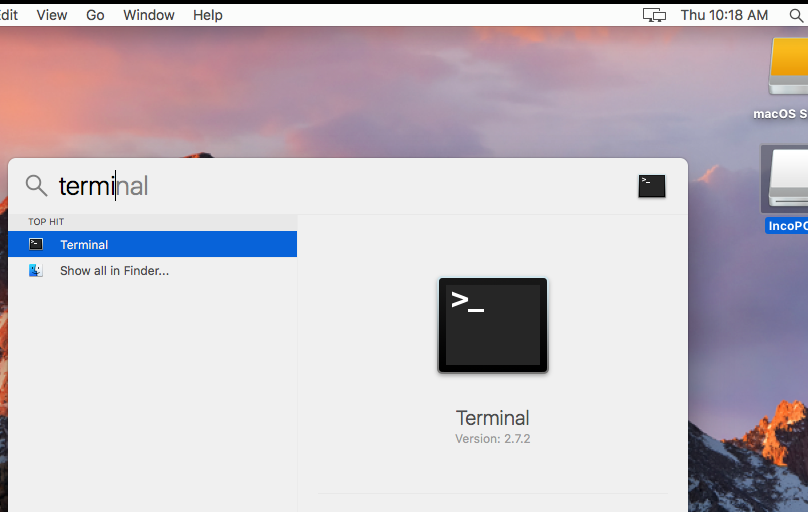
For the next part you need to open the Terminal app.
- To open the Terminal app click on the magnifying glass icon on the top right on your mac. This will open Spotlight.
- Type terminal in the search field.
- When the Terminal app appears in the list, select it by pressing Enter.

In the Terminal screen, type these commands and press Enter after each one of them:
cd /usr/local/mysql
This will change the current directory to the one where MySQL server is installed
sudo bin/mysql_secure_installation
This command will ask for your computer password. While typing it no characters will be displayed which is normal so don’t worry. Press Enter when finished. This will start a script which will ask you several questions and then reconfigure MySQL.
Set root password? [Y/n]
Select Y and press Enter. After that enter a password for MySQL and press Enter. Re-enter the password and press Enter again. This will be the password that IncoPOS will need when connecting to MySQL server.
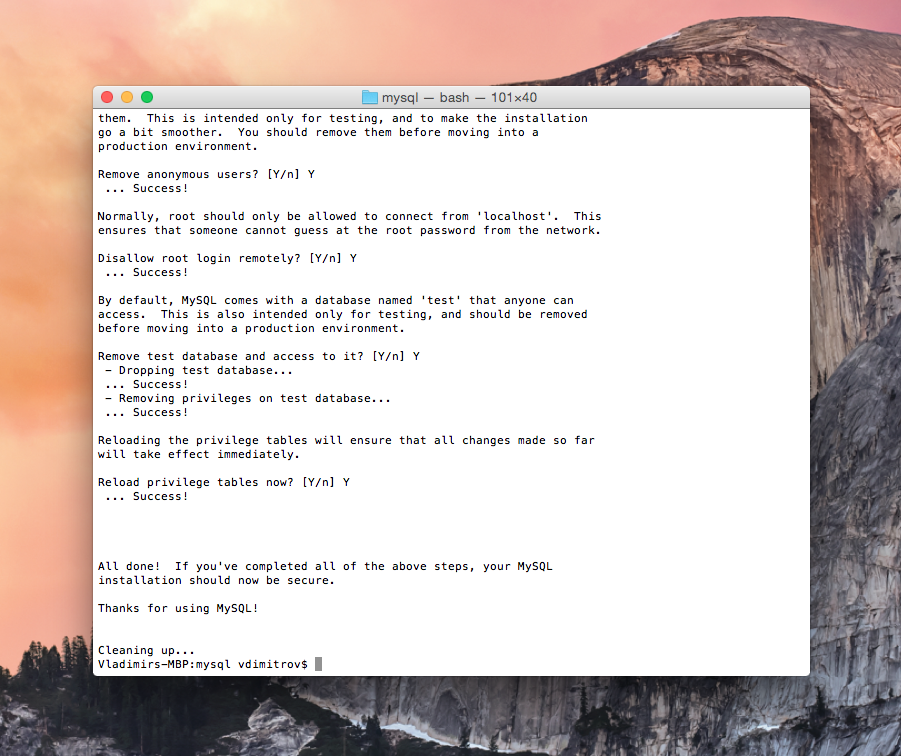
Select Y and press Enter. You don’t need anyone but you or someone you told your password to touch your data.
Disallow root login remotely? [Y/n]
Here you have to decide. If you have more than one computer that will be using this data then answer n. If this information will be accessed only from this computer then select Y. In all cases this can later be changed by using the same commands.
Remove test database and access to it? [Y/n]
Select Y and press Enter. You don’t need that test database so it is safe to remove it.
Reload privilege tables now? [Y/n]
Select Y and press Enter. This will make the changes you did effective now.
This is it! Now you have MySQL installed and secured on your Mac.